
Would you like to translate Pie Register forms into a different language? Many translation plugins are available for WordPress, and it can be challenging to find the best one.
Pie Register has several built-in translations available to help you translate the form. This tutorial will discuss how to translate your forms into a new language.
Translating Form Field Labels, Placeholders, and Default Values Using Built-in Customization Option
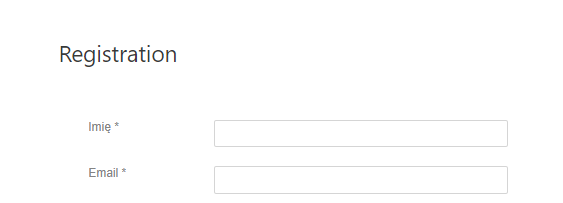
To translate the default name of any field in one of your forms, you can simply edit its label.
Open the form builder, then click the edit icon on the field whose label you want to translate. In the Field Options panel, enter your text in your desired language in the Label field. Similarly, you can also translate the placeholder for a field in the Field Options panel.
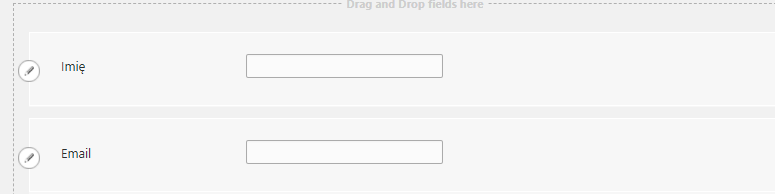
The output will be something like this.
Install and Activate Loco Translate to Translate Admin Areas
To get started, log in to your WordPress admin dashboard and go to Plugins > Add New.
- Download the plugin from the Add New option in your Plugins section of your Dashboard.
- Locate the Loco Translate Plugin and install it.

- Once it is installed, click Activate.

The plugin will now show in your list of Active Plugins.
Configure Settings
Once the plugin is installed and activated, you can access it from your admin dashboard.
Go to Loco Translate and locate Pie Register in the “Translate plugins” list, as shown in the image below.
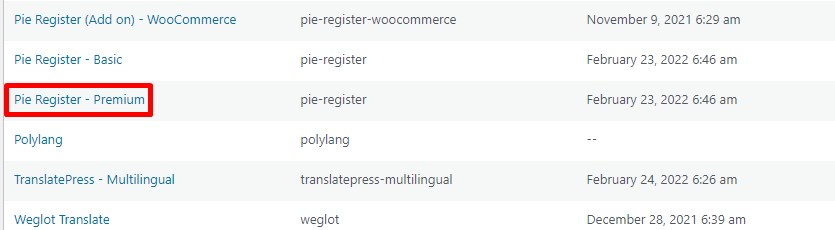
Click on Pie Register here, and it will take you to the translations page for Loco Translate, where you can select a new language for translating your forms.
Add a New Language
If you click on the “New Language” option, you are taken to the New Language page of Pie Register Loco Translate.
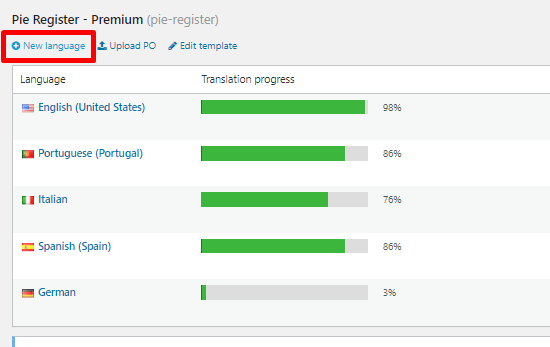
Here, you can choose any language you want from the drop-down or opt for the Custom Language option.

Ensure not to save them in the plugins folder (check screenshot above), as it will be over-written when the plugin updates. You can opt for the remaining two options for smooth translations. You can start translating once you are done by clicking on the “Start Translating” button.
The next page will show you a list of all the text strings from your form builder. For each text string, you will have to enter translations manually.
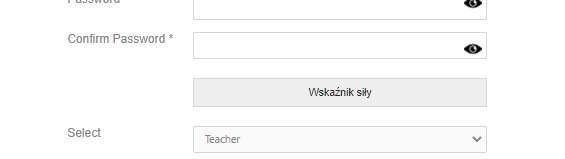
As shown in the image, the language we have chosen for this tutorial is Polish, and the text string we have chosen is “Strength Indicator.”

After you have finished translating text strings, you can hit Save.
To view the result, you must first go to Dashboard > Settings.
Go to General Settings > Site Language and set the site language to the one you have translated.
For this tutorial, we are using Polish, as shown below.

Note: The language options in WordPress Dashboard Site Language Settings are in local languages. We have chosen Polish, locally known as Polski, as shown in the image above.
Once you have set your desired site language, hit save. Now you can check your result.
Here is what the “Strength Indicator” text looks like in Polish.
Save your translations
That’s it! Just like we have added a Polish translation to one text string in the form builder, you can add it to all translations. After each addition, don’t forget to hit save! For more information, please feel free to Contact Us or comment below.