
Pie Register allows you to create registration forms with the simplest drag and drop form builder. The community version allows a single registration form while the PRO version offers an unlimited number of forms.
Create Registration Forms
For creating a registration form, here’s what you need to do.
- Login to your Word Press blog or dashboard.
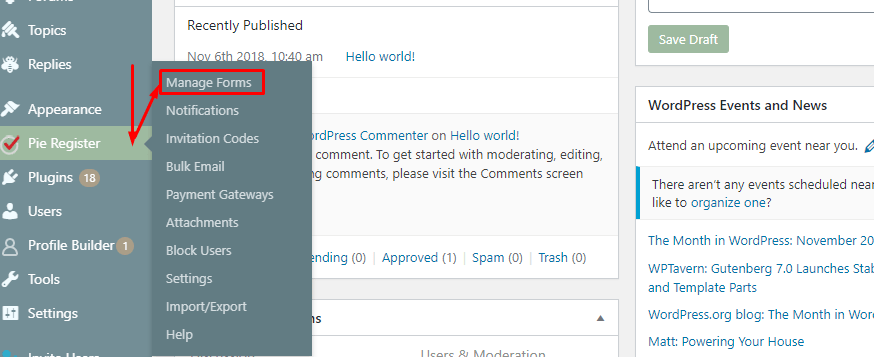
- You will be able to see Pie Register in the list on the left panel of your dashboard. Hover the mouse over it or click, and select ‘Manage Forms’.
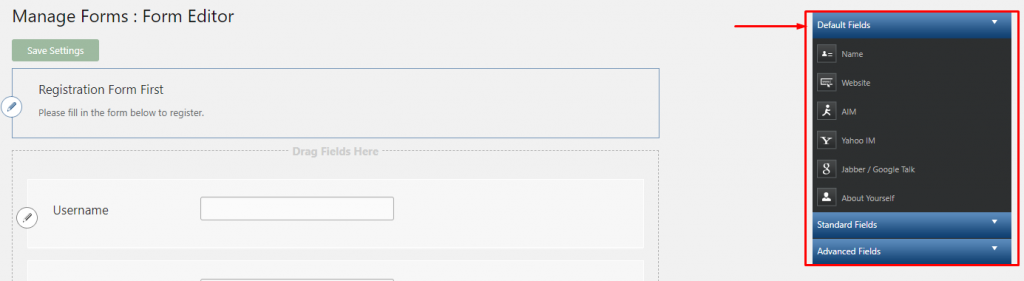
- This opens up the main page, which already contains a default Registration form. Edit the default form or click on the ‘Add New’[PRO] button to create a new form.

- Add new fields from the Default Fields, Standard Fields, and Advanced Fields tabs, at the top-right corner of the editor.
- Edit and customize the fields and buttons by clicking on the Edit. Each field has a number of properties, that can be set as per the website requirement. A few of the Edit field options include Label, Description, CSS class for custom styling, Validation messages, and the Password Strength (for password fields).

- To delete a field, hover the mouse on the respective field. Click the (x) button on the top-right corner of the field.

- Fill in the Form Details, by editing the topmost field, adding labels and descriptions about the form, CSS class, and other custom options.
- Save the form by clicking on the Save Settings.
Edit, Delete, Preview Form
- To Edit an already existing form, Login to your Word Press site or blog.
- From the left panel of your dashboard, select Pie Register > Manage Forms.
- In the registration form table, click the Edit button under the form you want to edit.
- Save the changes.
- To delete a form, click on Delete, below the form’s name.
- To see how the form will be displayed on your blog/website, click on the Preview button below the form.
NOTE : Make sure that you’ve allowed users to register on your site in the WordPress settings.
