You can configure Pie Register settings from the settings page.
To configure Pie Register’s settings:
- Login to your blog/site and go to your dashboard.
- In the dashboard’s menu, click on Pie Register > Settings.
Default Pages Settings
The following are the steps for configuring page settings.
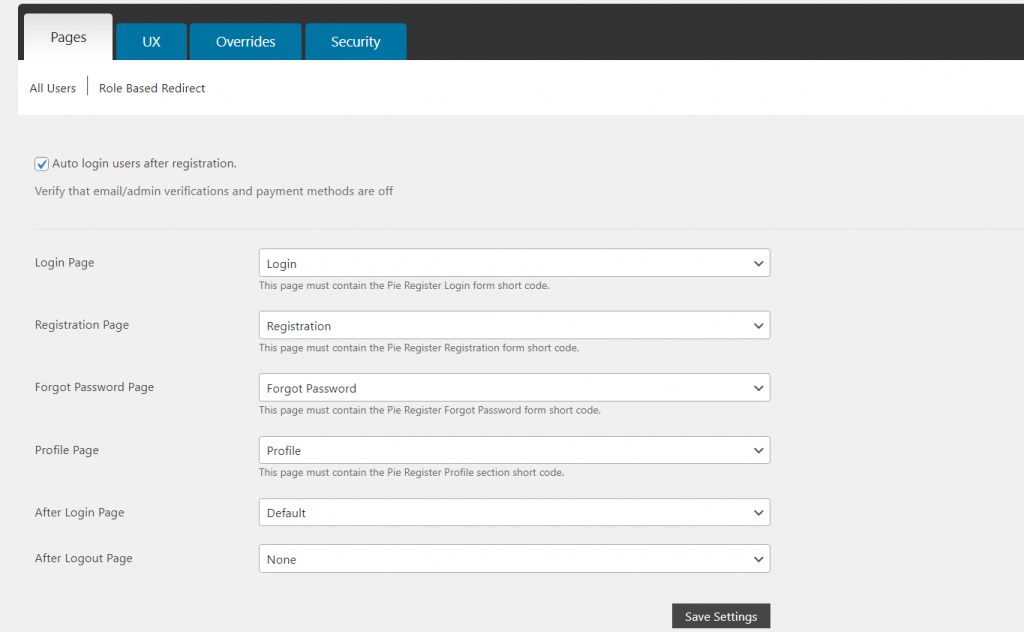
- From the Pages tab, you can configure settings for pages.
- From the All Users sub-tab, you can set default Login Page, Registration Page, Forgot Password Page, Profile Page, After Login Page, and After Logout Page.
- Also you can enable Auto login users after registration.
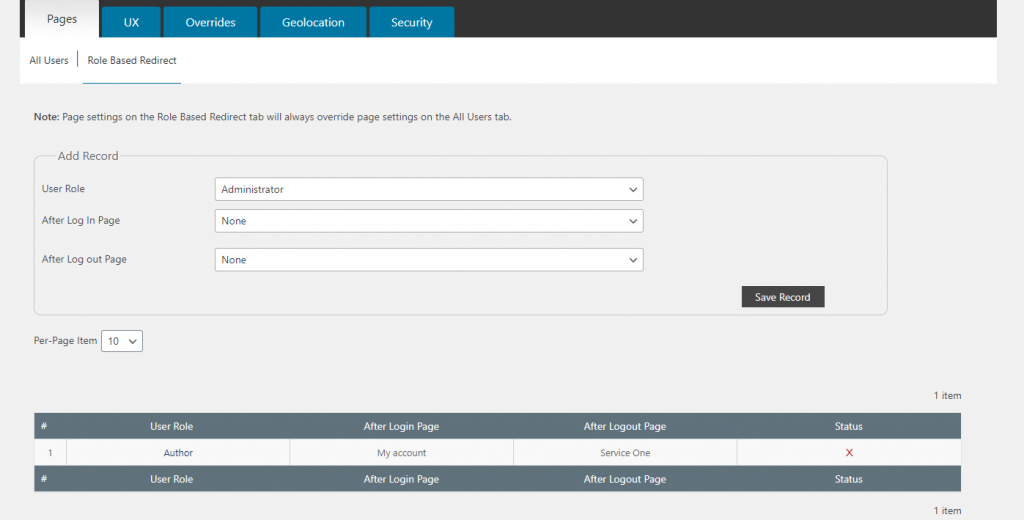
- From the Role-Based Redirect sub-tab, you can set redirect based on user roles.
Configure UX Settings
You can configure UX settings to make it a more user-friendly experience for the website users.
- In the dashboard’s menu, click on Pie Register > Settings and select the UX tab.
- From the UX tab, you can configure the UX elements of your website.
- From the Basic sub-tab, you can check to enable Show tips and hints on the form editor tool.
- From the Login Form section, you can edit Username Label, Username Placeholder, Password Label, and Password Placeholder.
- From the Forgot Password Form section, you can edit Username Label, Username Placeholder.

Custom Logo and Tooltip
- In the dashboard’s menu, click on Pie Register > Settings and select the UX tab.
- From the Custom Logo section, you can specify a custom logo URL, Upload a custom logo, enter logo Tooltip Text, and enter logo Link URL.
![]()
Disable CSS
- In the dashboard’s menu, click on Pie Register > Settings and select the UX tab.
- You can disable Pie Register’s CSS generation if your theme is conflicting with Pie Register’s CSS.
- You can also disable Pie Register’s jQuery UI for enhancements, however disabling it may limit Pie Register’s functionality.
- Click Save Settings once you are done configuring.
![]()
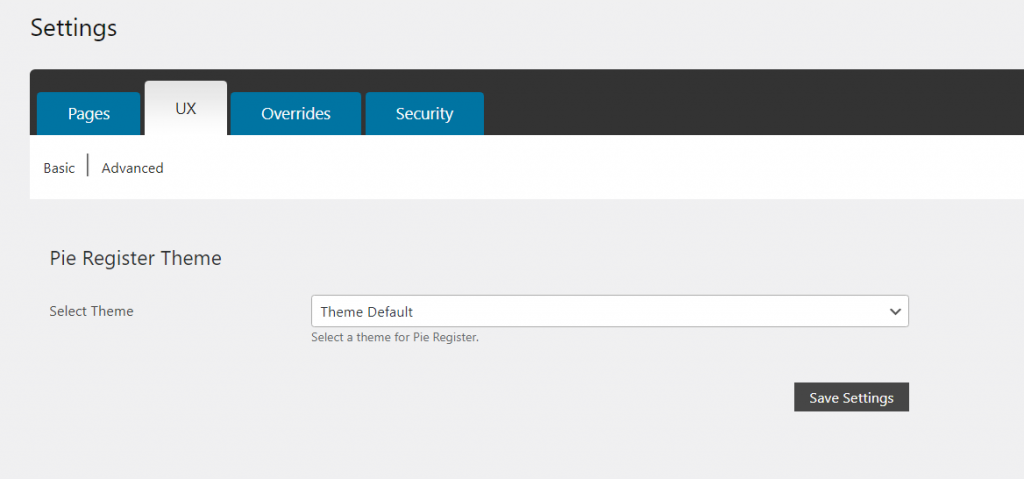
Pie Register Theme
- In the dashboard’s menu, click on Pie Register > Settings and select the UX tab.
- From the Pie-Register Theme section, you can select them for the plugin.
Miscellaneous Override Settings
- In the dashboard’s menu, click on Pie Register > Settings and select the Overrides tab.
- From the Overrides sub-tab, you can configure a few settings to override existing ones.

Pie Register Security Settings
- With Pie Register, you can set up reCAPTCHA, Math CAPTCHA, no CAPTCHA reCAPTCHA, hCaptcha(Premium) and Honey Pot on Login and Forget Password forms to make sure no bots manage to get into your website.
- In the dashboard’s menu, click on Pie Register > Settings > Security.
- To enable CAPTCHA in Login Form select Yes or select a number to enable CAPTCHA after a certain number of login attempts in the Login Form section.
- In the Forgot Password Form section select Yes to enable CAPTCHA on Forgot Password Form.

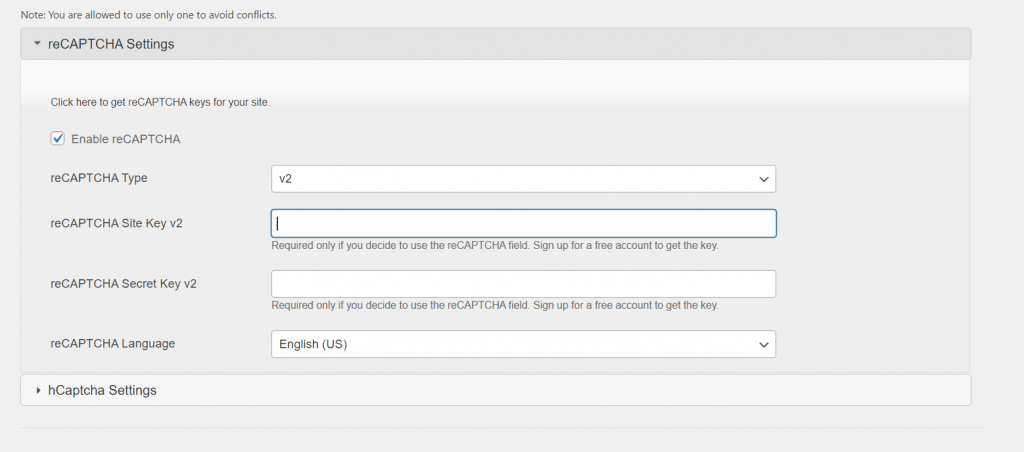
Setup CAPTCHA Settings
- Login to your Pie Register WordPress Admin Dashboard and go to Settings.
- Click on the Security tab and scroll down to the reCaptcha, hCaptcha settings(Premium).
- You can configure reCaptch and hCaptcha settings(Premium).
- You can only enable one kind of Captcha at a time to avoid conflicts.
Setup User Registration Verification
Pie Register lets you Verify and Moderate the user registration process hassle-free.
Here is what the Verify and Moderate feature have to offer:
- You can protect your website from fake sign-ups by asking users to verify their email addresses.
- Admin can also verify the users through the WordPress dashboard where all the unverified users are maintained under the Admin panel.
- Set up a Grace period- time limit within which the user account must be verified, otherwise the account is terminated.
- Set up a process for verification of Change in the email address, by authenticating a request to the old email address to verify the new one.

Restrict Website Content From Search Engine(s) / Bot
To restrict Search Engines and Bots:
- Login to your blog/site and go to your dashboard.
- In the dashboard’s menu, click on Pie Register > Settings > Security.
- Restrict search engines and bots from crawling page content.
- In the Basic sub-tab, scroll down to Restrict Search Engines and Bots from crawling website content. Click to enable Restrict search engines and bots from crawling page content.
- In User Agents to reject enter agents to restrict access. (One in each line)
- Enter Text to send bots when blocking access.
- Click Save Changes.

Timed Registration Form Submissions
You can reject auto registration forms based on the time it took to fill them out. This is an added safeguard against bot activity.
- Login to your blog/site and go to your dashboard.
- In the dashboard’s menu, click on Pie Register > Settings > Security.
- In the Advanced sub-tab, check Time form submission, and enter time in seconds.
- Also, you can Limit the number of form submissions from a device within a day. [Premium]
- Click Save Settings.

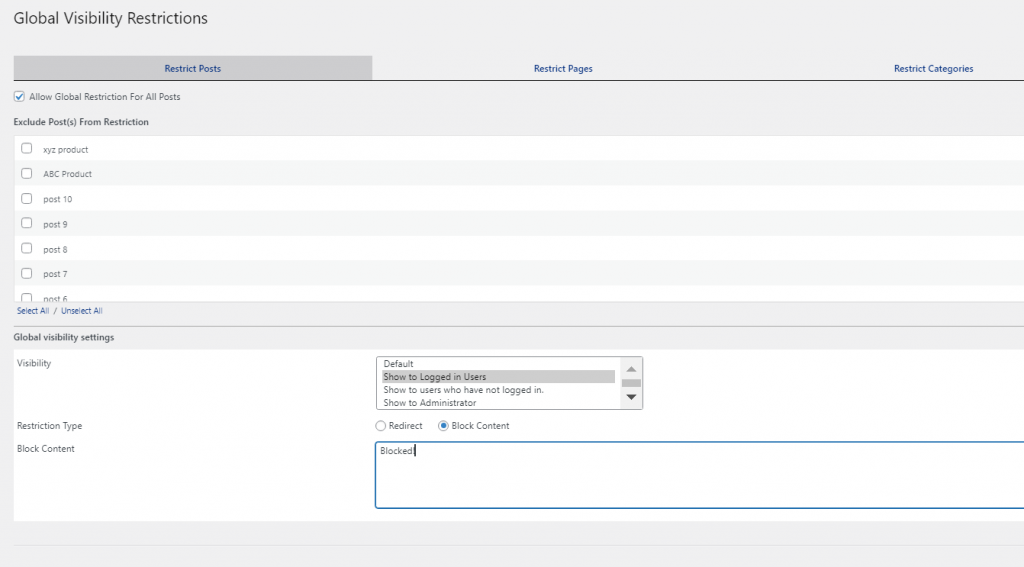
Global Visibility Restrictions
Pie Register facilitates its Premium Users with an option of Global Visibility Restrictions. An admin can restrict all posts pages or categories at once from the Global Settings instead of limiting it to separate pages.
- You can choose whether to redirect the user or block the content of the page.
- You can add a URL or select a page from the dropdown to redirect the users when redirecting.